Returning SharePoint Online TermSet in a tree structure using SharePoint Framework SPFx

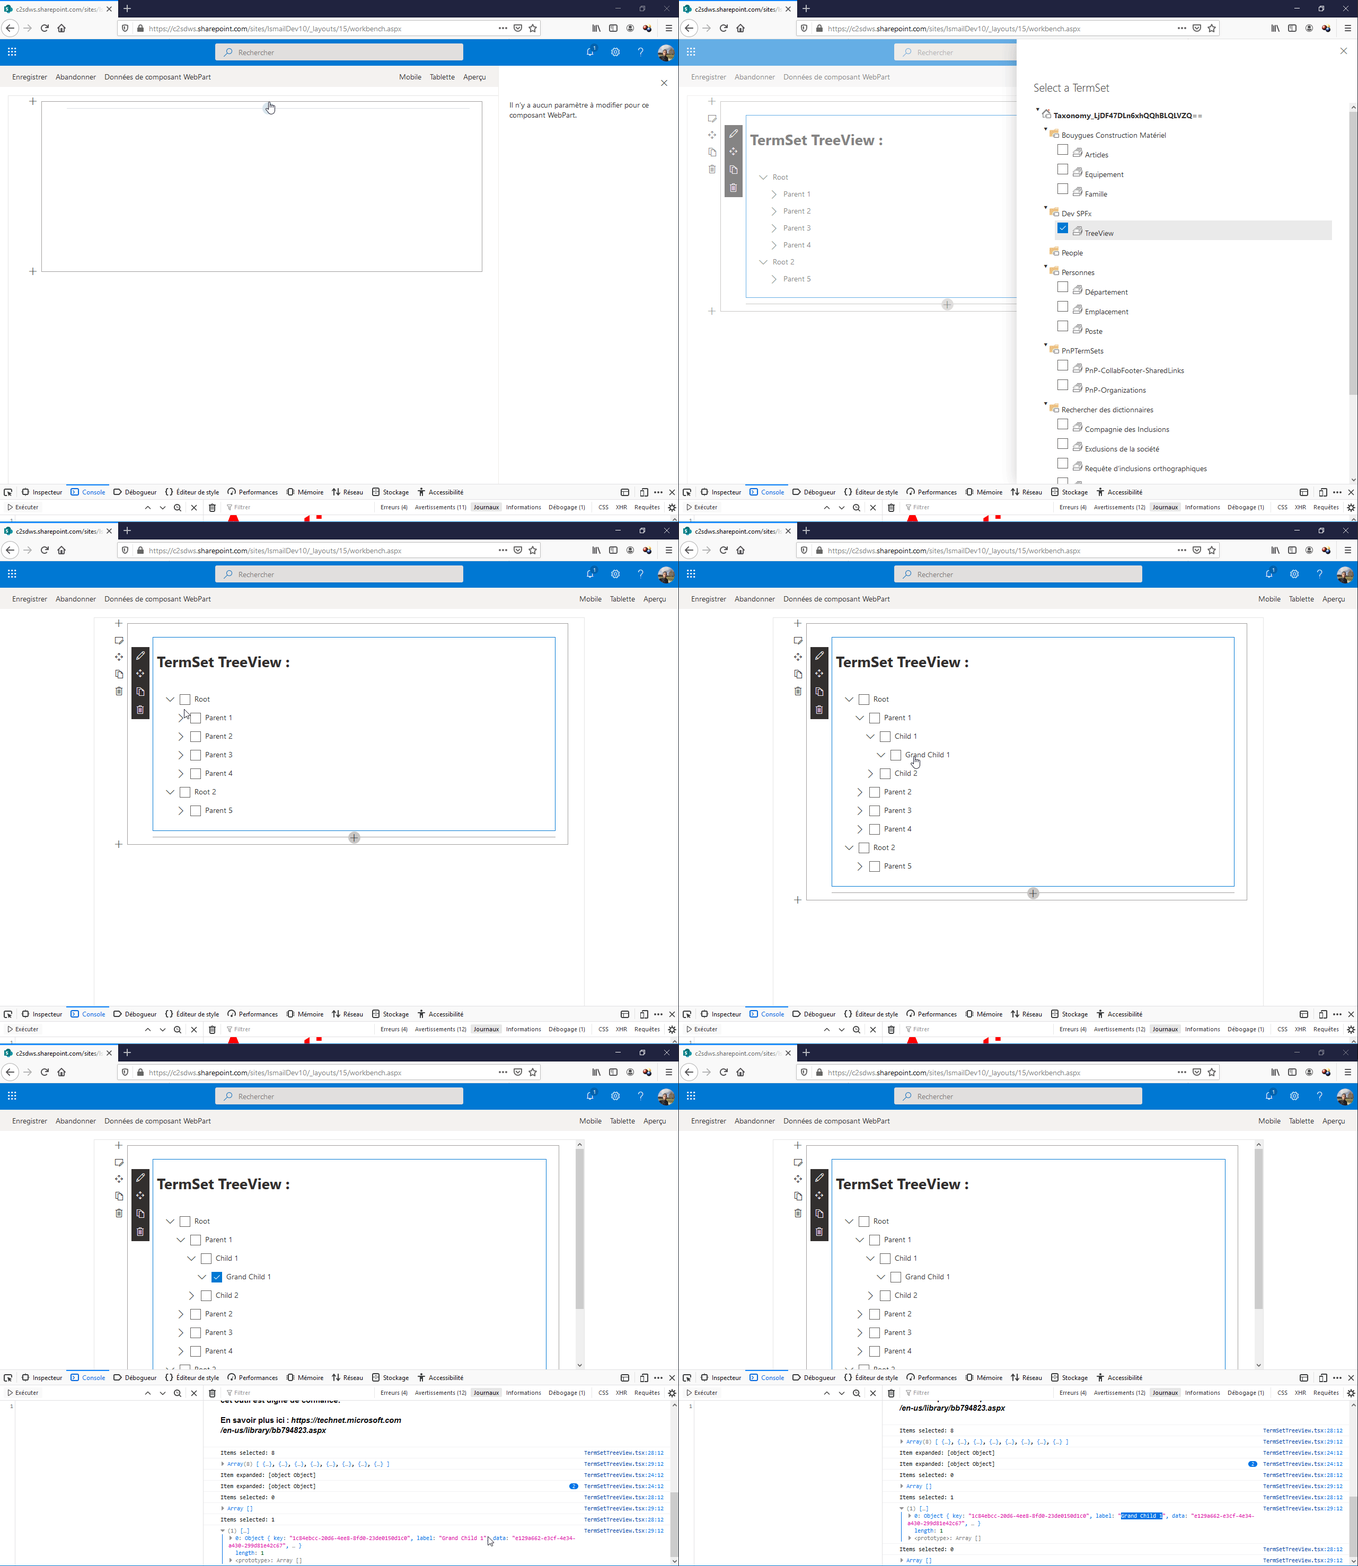
Recently, I needed to render out a large list of items stored in our SharePoint Online metadata TermSet into a tree structure in SharePoint WebPart.


I created a termset, added terms, then added additional terms within each parent term. But when it came to rendering all of these terms out using « sp-taxonomy.js », I realized that there was no way to get the data back structured in the same hierarchy that we inputted.


To fix this issue, I wrote utility methods that get the terms from the term set, create a hierarchical tree of terms based on their path.


  • Function to get all terms from a term store


public async getTermSetTags(_siteCollectionUrl,_termStoreGuid,_termSetId){
const _taxonomy = new Session(_siteCollectionUrl);
const store = await _taxonomy.termStores.getById(_termStoreGuid).get();
const termSet: ITermSet = store.getTermSetById(_termSetId);
const termsWithData: (ITermData & ITerm)[] = await termSet.terms.select('Id', 'Name', 'Parent').get();
return termsWithData;
}

  • Function to create a tree structure from my terms list


public getTermSetTree = (
data = [],
{idKey='id',parentKey='parentId',childrenKey='children'} = {}
) => {
const tree = [];
const childrenOf = {};
data.forEach((item) => {
const { [idKey]: id, [parentKey]: parentId = 0 } = item;
childrenOf[id] = childrenOf[id] || [];
item[childrenKey] = childrenOf[id];
parentId
? (
childrenOf[parentId] = childrenOf[parentId] || []
).push(item)
: tree.push(item);
});
return tree;
}


You can find the source code of the SPFx WebPart in github.

SPFx Anchor Tag target="_blank" seems to get ignored

When you’re developing WebParts with SharePoint Framework « SPFx », you may have run across an issue when  you try to create an HTML URL element « a » with target set to « _blank » to open your  URL in a new tab but it seems to get ignored.

This issue appears only when you try to open another SharePoint page from a SharePoint page, i.e. the href value in a URL of your SharePoint domain.

To solve this problem, you can override the page router for hyperlinks by adding the « data-interception » attribute to the link with a value of « off ». This will let the loading to bypass the page router logic.


<a href="https://yourtenant.sharepoint.com/sites/yoursite/SitePages/yourpage.aspxtarget="_blankdata-interception="off">Your link</a>


There are some built-in features to bypass the page router logic by changing the value of the « data interception » attribute which provides various methods to bypass or partially the page router logic.

  • The first option is « off ». When you set the property to off, it means that the smart loading done by modern SharePoint will be ignored.

  • The second option is to use the value « propagate ». In this case, the page router is not bypassed, but it allows your own click handlers to fire, which could mean that you can do any additional processing before the anchor tag is redirected.


Understand SharePoint Field Names : How To Encode And Decode Field Names

When you create a column for a list/library, SharePoint creates two names for it.

  • Display Name
  • Internal Name

To understand that, you can check the column « Created By » that has the internal name « Author ».

The internal name can not be changed once the field is created, but you can change the display when you want.


You can assign internal names for your fields if you are creating them by code (PowerShell…). But when you create your fields manually from the web interface, SharePoint lets you assign only the display name and creates the internal name based on the display name you entered.

When you create fields manually with non-alphabet or numeric character, SharePoint converts them to special hex codes.

For example, if you create a field called « Job Title », the internal name for this field then will be « Job_x0020_Title ».


In the table below, you can find the encoded special characters when used in SharePoint fields :


Character

Internal Name in SharePoint

~

_x007e_

!

_x0021_

@

_x0040_

#

_x0023_

$

_x0024_

%

_x0025_

^

_x005e_

&

_x0026_

*

_x002a_

(

_x0028_

)

_x0029_

_

_

+

_x002b_

_x002d_

=

_x003d_

{

_x007b_

}

_x007d_

:

_x003a_

_x0022_

|

_x007c_

;

_x003b_

_x0027_

\

_x005c_

< 

_x003c_

> 

_x003e_

?

_x003f_

,

_x002c_

.

_x002e_

/

_x002f_

`

_x0060_


space

_x0020_


Below, you can find 2 JavaScript functions that let you to encode and decode internal field names.


  • From internal name to display field name using Javascript
function decodeField (field){
var decodedString = field.replace("_x", "%u").replace("_", "");
return unescape(decodedString);
}
  • From display name to internal field name using Javascript
function encodeField (field){
var charToEncode = field.split('');
var encodedString = "";
for(i = 0; i < charToEncode.length; i++)
{
encodedChar = escape(charToEncode[i]).toLowerCase();
if(encodedChar.length == 3)
{
encodedString += encodedChar.replace("%", "_x00") + "_";
}
else if(encodedChar.length == 5)
{
encodedString += encodedChar.replace("%u", "_x") + "_";
}
else
{
encodedString += encodedChar;
}
}
return encodedString;
}

Implémentez votre prochain assistant personnel d’intranet SharePoint grâce au Bot Framework et SPFx

How to open OST files without Outlook and Exchange connection ?

Outlook OST files, in offline mode, store Microsoft Exchange mailbox data on the host computer.  To access OST files with updated information, the file needs to be synchronized with an Exchange Server. OST file becomes orphaned when the mailbox becomes completely unavailable on Exchange Server. 

Also, there are circumstances such as server maintenance, technical interludes, server crashes, etc. that make the Exchange Server inaccessible. Also, there are chances that OST files become corrupted or damaged due. Both domestic and commercial users bumble in opening their OST files after such incidences.


How to access OST files then ?


We all know that OST files can be opened only using an Exchange profile in MS Outlook. It is probable that you might find yourself in difficulty while accessing your OST file. At times, when we abandon Outlook usage for any other email-client, we experience the dire need of viewing our old messages, calendars, contacts, etc.

One of the methods of opening your OST file is by using third-party tools when Outlook is unavailable. It gives you the most authentic and unambiguous result in a diligent way. This professional software seamlessly opens OST files without the need for an Exchange Account or MS Outlook. It displays the entire OST content comprising of emails, attachments, Deleted Items, Calendar, contacts, attachments, etc.


OST Viewer- What makes it an outstanding tool for viewing OST files ?

  • It is FREE software for viewing the OST files
  • Perfect fit for opening healthy & corrupted OST files.
  • OST Email lists can be copied and printed in HTML Format.
  • 'Find' option embedded in the software allows you to open specific OST email items
  • Search Facility to locate the file within a disk drive.
  • Generates comprehensive file analysis reports to assess the OST data
  • The graphical user interface provided by the software is user-friendly and intuitive.
  • Compatible with older and newer versions of MS-Exchange, MS-Outlook & Windows OS.
  • Opens OST email attachments.

How does the free OST Viewer application work ?


    1.  Open the free OST Viewer application. In the Source File Selection dialog box, browse the OST file that you want to open.


    2.  Select the OST file and click the OK button. [ Note: This software has an inbuilt Search option to fetch the location of OST files on a specific drive. ]

    3.  Following the scanning process, mailbox folders are displayed in the left panel in a hierarchical format.


    4.  A user can browse through the folders displayed in the left panel to view and access the content of the desired folders like Inbox, Contacts, Calendar Items, Sent Items, etc. To save the OST email list, click on ‘HTML File’ button to ‘Save’ list information.


    5.  To generate OST File Analysis Reports, click the ‘required report type’ on the right pane. Then select the required folders and click ‘Analyse’.


    6.  The OST file Analysis Report will be produced in real-time.


Summary

OST Viewer tool is facilitated with an intuitive Search option that finds OST files without taking much time. After you insert the drive location and click on Search in Source File Selection dialogue box, the location of the OST files is conveniently detected. This OST Viewer tool allows you to view analytical reports on OST file. You can also view specific email data by filtering by attributes like 'Date,' 'From,' 'To,' etc.